IDEA provides training videos and user instructions for using the digital teaching equipment in seminar rooms at Helga Engs Hus.
Training videos
IDEA produced six short videos demonstrating how to use the digital teaching equipment.
The videos are in Norwegian with English subtitles.
Help us improve our services - Share your user feedback with IDEA (Norwegian link)
Getting started
Learn how to log onto the PC, open presentations, and show material on the screens around the room.
Side screens and the Projector
Learn how to display material across the different screens in the room - side screens, back screen, and the projector.
The Camera
Learn how to use the room camera for digital and hybrid teaching.
Speakers, teleloop, and microphones
Learn how to control audio for the room speakers, the telelooper to connect with hearing aids, and the microphones in the room.
Connecting with a laptop
Learn how to connect and integrate your own laptop with the equipment in the seminar rooms.
Whiteboard function with Side Screens
Learn how to use the whiteboard functions of the side screens - a useful application for group work.
Further user instructions
Here are additional user instructions, including instructions for other equipment you will find in the seminar rooms.
Help us improve our services - Share your user experiences with IDEA (Norwegian link)
Lectern


Control Panel

You can change the Control Panel to English by clicking on the flag icon in the upper right corner (British/Norwegian flag)

- Turn on the projector and other screens, and change the video source (Bilde),
- Activate the camera functions (Kamera)
- Adjust the sound and microphone settings (Lyd),
- Turn off the system (Avslutt).
Video/Image Source (Bilde)
The Control Panel provides control over which Video/Image Sources are displayed around the room. Choose the Bilde icon on the Control Panel to access the Video/Image Source menu. Under Bilde, you can control which computer - Fast PC-1, PC-2, or laptop - is displayed. You can choose where to display to - the front projector (Prosjektor), the side screens (Side skjermer), and/or back wall screen (Bakskjerm). Bilde also allows you to make the screens blank (Blank) and to raise or lower the projector screen (Lerret).
Camera (Kamera)
On the Control Panel, choose Kamera to activate and control functions of the room's roof camera. You can zoom in/out, change the camera angle, and set Tracking (Sporing) so the camera follows you as you move around the room.
Audio (Lyd)
On the Control Panel, choose Lyd to control functions of the room's speakers and microphones. You can adjust the volume and mute the speakers, the wireless microphones, and roof microphone.
Stationary (Fast) PC
Each seminar room has a startionary (Fast) PC that can be used like any other PC on UiO's campus. Login using your UiO username and password. The Fast PC is connected to the Control Panel, and the Control Panel provides control over the other equipment in the room.

One you have logged in using your UiO account and password, you will have access to your Desktop, including all the files and folders from your UiO computer.

The two screens, Fast PC-1 and Fast PC-1, are connected to the stationary PC, providing you with dual monitoring of your Desktop.
You can move program windows between screens by clicking and dragging programs with the mouse.
A stylus attached to the side of the screens gives you control to write or draw on the screens. You can display what you write or draw if the display you are writing on (Fast PC-1 or Fast PC-2) is being projected to the projector or room screens. Erase your writing or drawing using the opposite end of the stylus.
Before you lease the room, please remember to Log Out from the PC and return the stylus to its holder.
Projector and Screen
The room's projector is mounted to the roof. The Projector will display either the Fast PC screen or a connected laptop to the projector screen at the front of the room.

Use the Control Panel to select which screen is displayed to the Projector (Prosjektor). On the Control Panel, press Bilde, and under Prosjektor choose either Fast PC-1, Fast PC-2, or Laptop. Ensure a laptop is connected to the HDMI cable if you want to display from a laptop.
When you turn on the Control Panel, the projector screen should automatically drop down. You can also lower (Senk) or raise (Hev) the projector screen from the Control Panel.
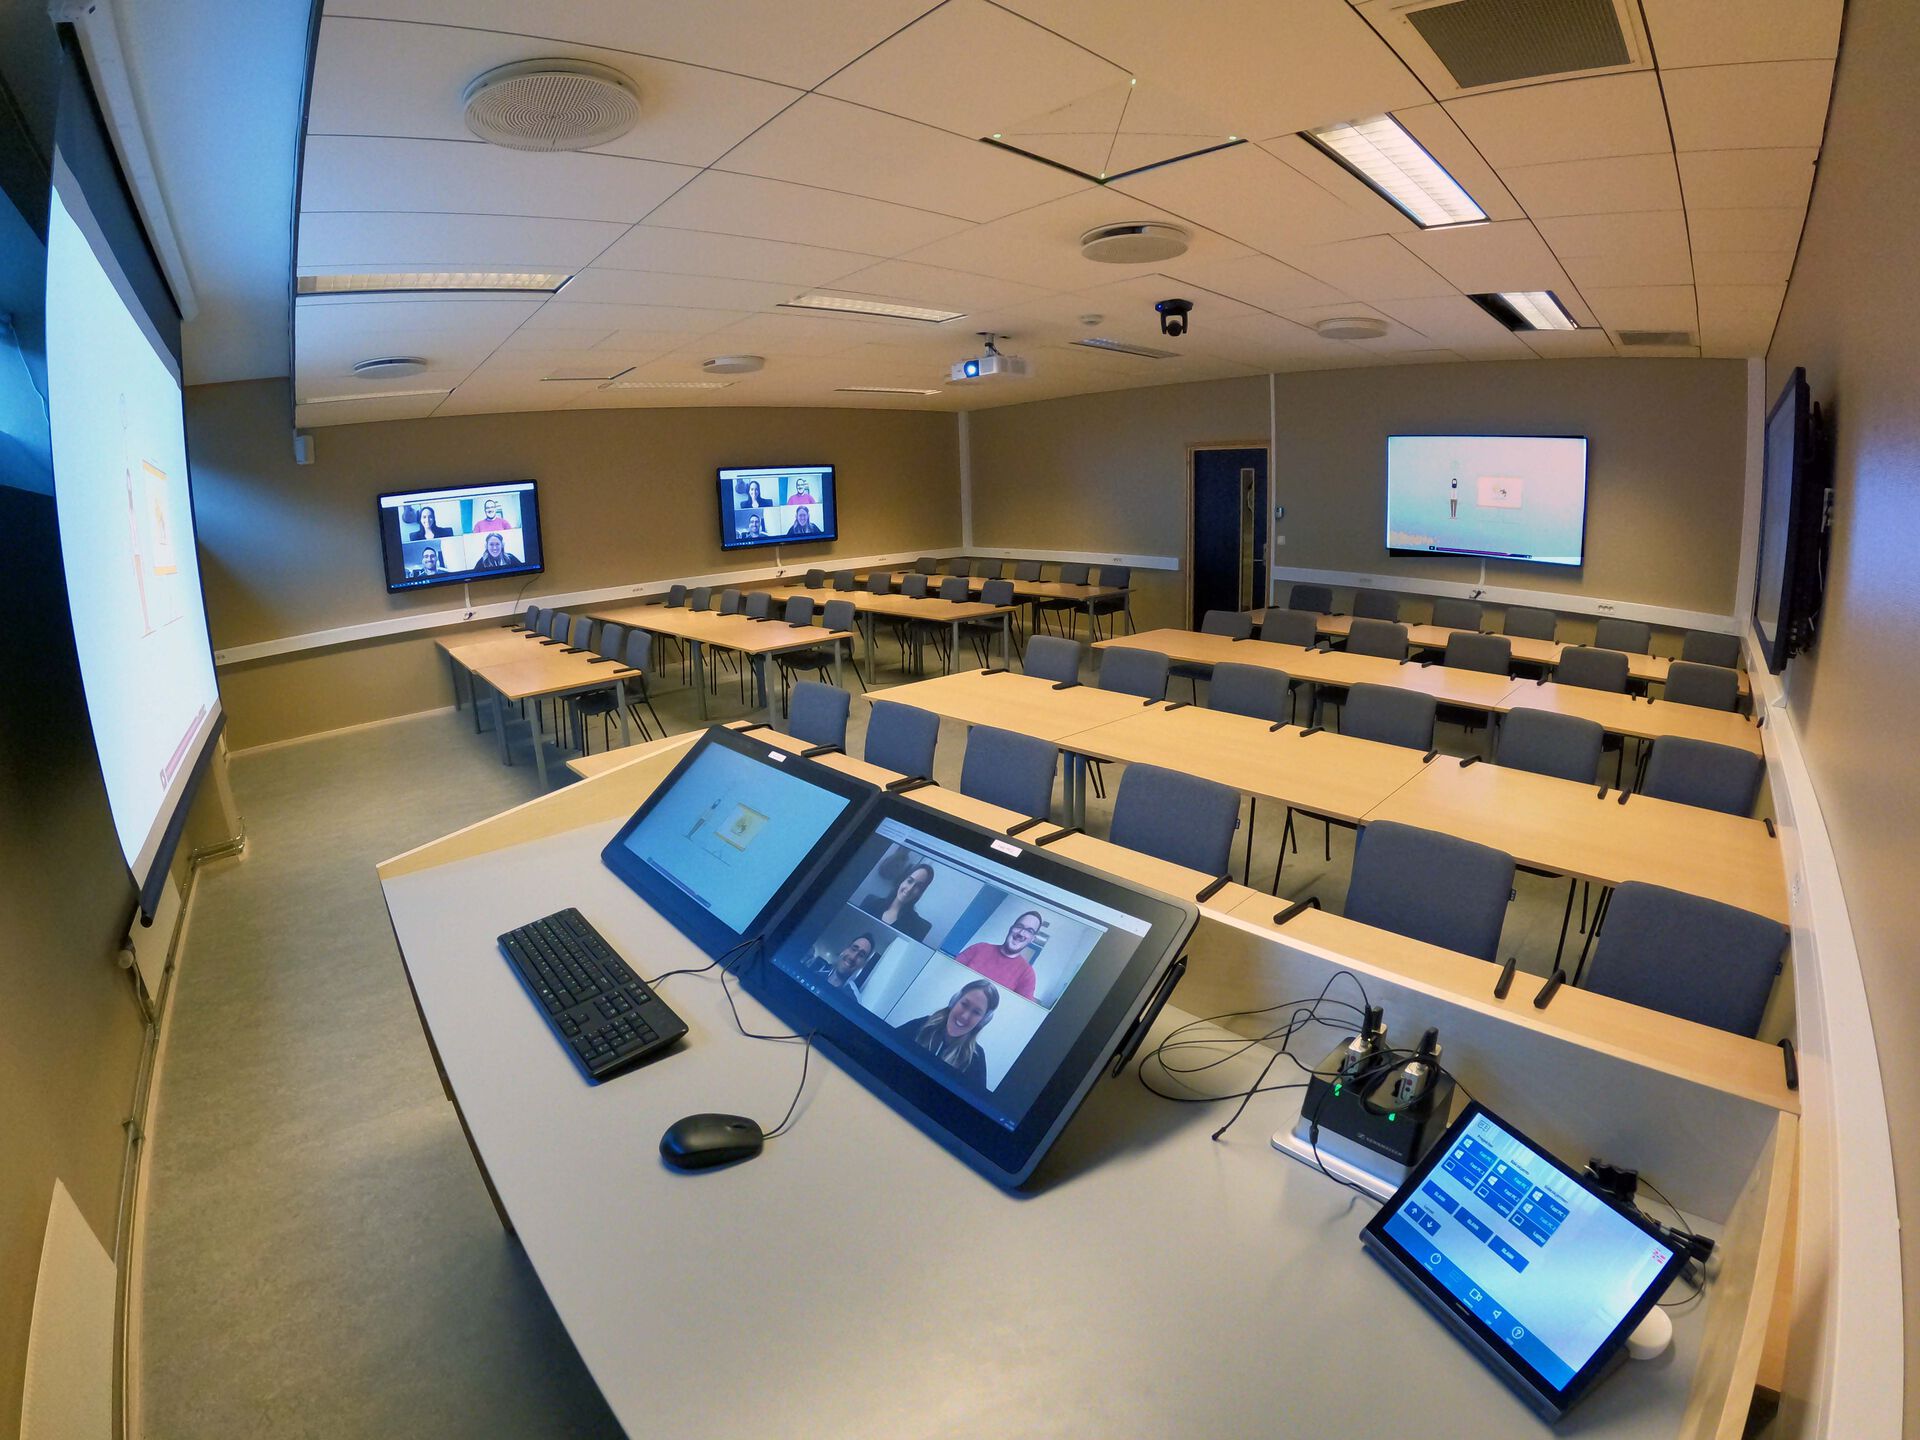
Side Screens and Back Wall Screen
Seminar rooms include Side Screens and a screen or projector on the back wall.

Display Video/Image Source to Side Screens or Back Wall Screen
The Control Panel allows you to display a Video/Image Source to the Side Screens (Sideskjermer) and Back Wall Screen (Bakskjerm). On the Control Panel, press the Bilde icon, and then select which display you want to project to which screens - Fast PC-1, Fast PC-2, or Laptop. You can choose to display the same Video/Image Source to all screens, or choose different Video/Image Sources for different screens. For example, you could display Fast PC-1 to the Projector and Back Wall Screen, and display Fast PC-2 or Laptop to the Side Screens.
NOTE: You cannot share different Video/Image Sources to individual Side Screens.
Connecting the Side Screens to student laptops or mobile devices
Teachers and students can connect individual laptops or mobile devices to the Side Screens.
Each Side Screen has a USB-C and HDMI cable. These cables hang on the side of the screens.

Ensure the Side Screen is turned on before connecting a laptop or mobile device via the USB-C or HDMI cable.


Whiteboard function of Side Screens
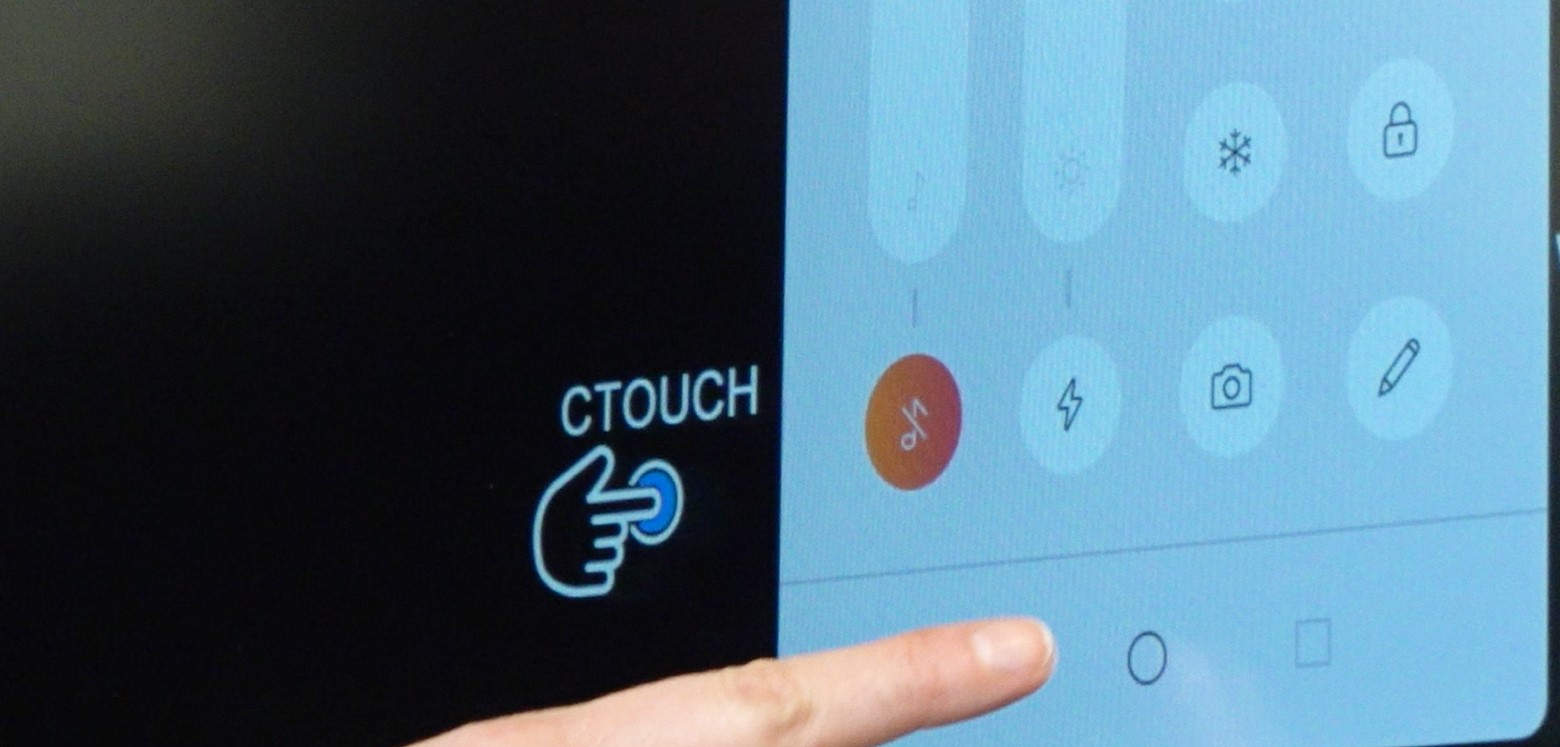
The Side Screens can also function as electronic whiteboards with the program UBoardMate2. UBoardMate2 is already installed on all Side Screens. To activate the whiteboard function, ensure the Side Screen is turned on. The screen is on when the button on the screen's bottom is blue.
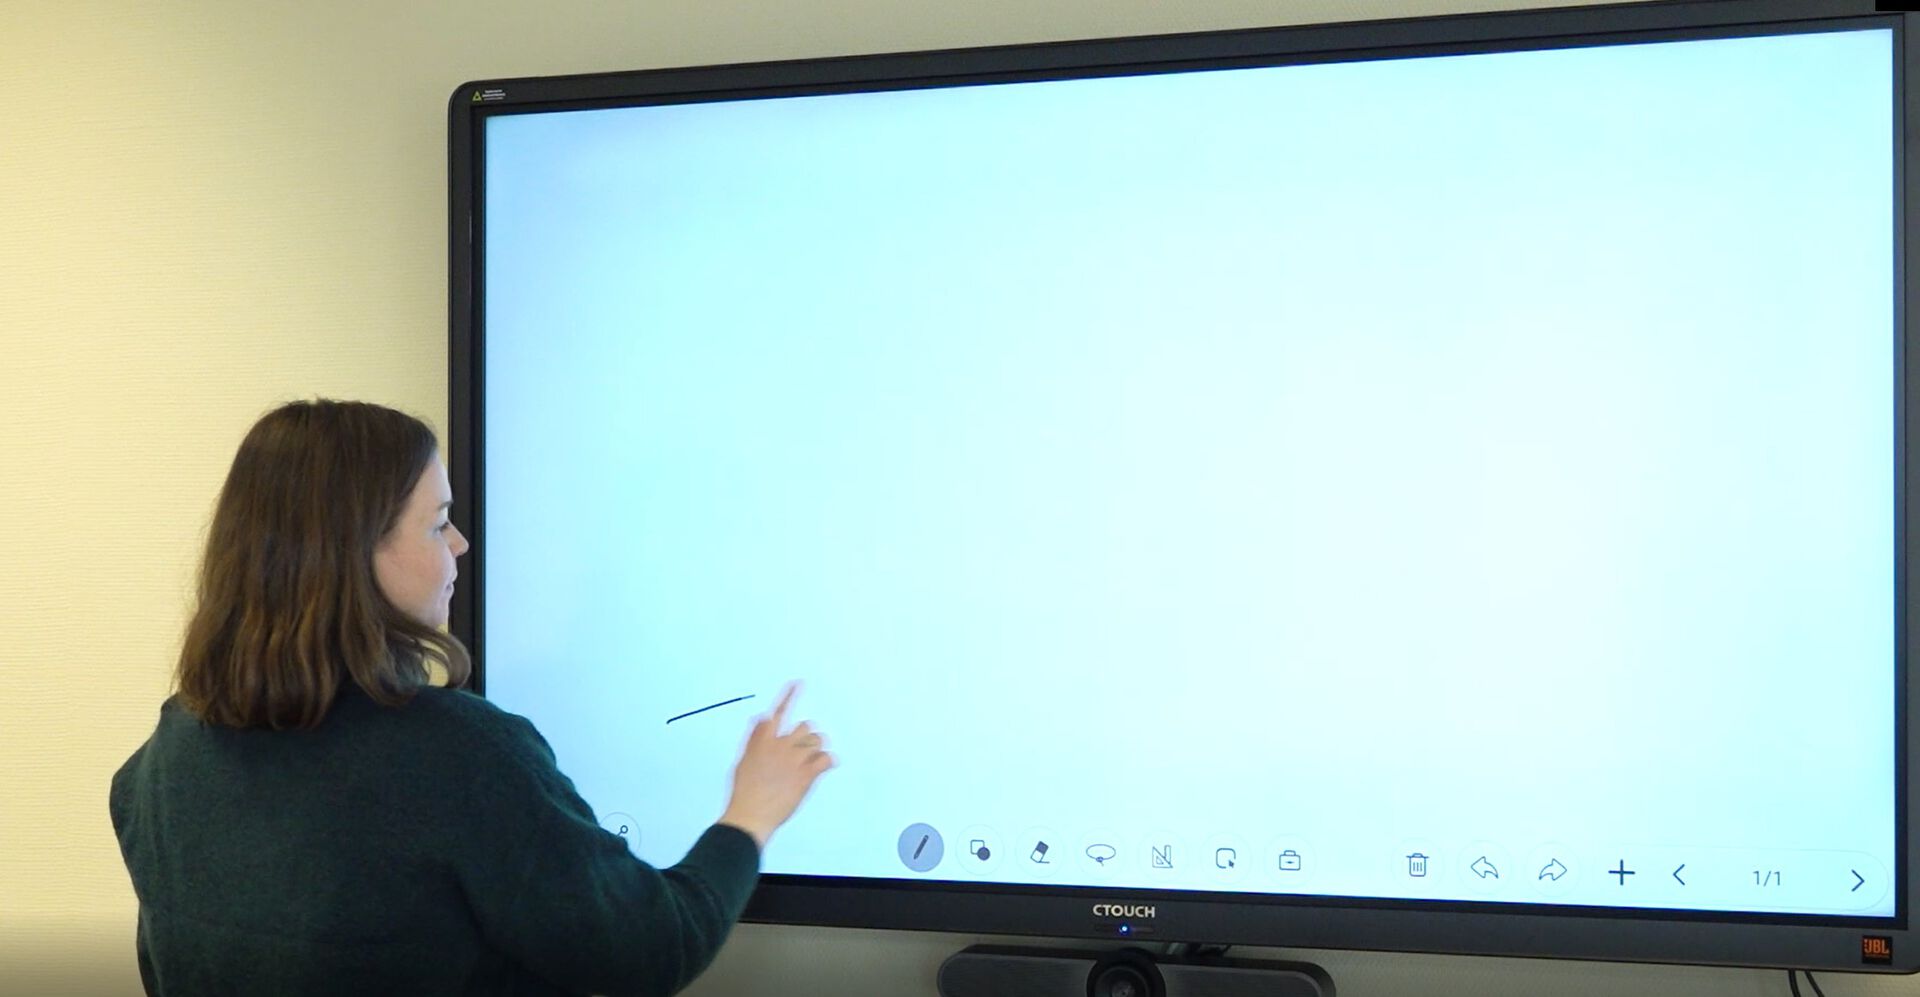

After pressing the blue botton twice, and then selecting the O icon from menu that pops us, an App Menu should appear, allowing you to select UBoardMate2.
Once UBoardMate2 is open, the screen will turn white and a tool bar will appear on the bottom of the screen. You can now use your fingers to write or draw on the screen, and select different tools, colours, pencil sizes, and more to work with. Please only use your fingers when drawing on the screen.

The Tool Bar on the bottom allows you to change functions of the drawing (size, colour, etc.), access an Eraser, and add other features to the screen. Feel free to explore the functions.

If you want to save the whiteboard as notes, you can transfer the whiteboard image to a USB drive. Insert a USB drive into an available port on the side of the screen.
Camera
There is a roof mounted camera in all seminar rooms.

From the Control Panel, choose Kamera to open the Camera functions.
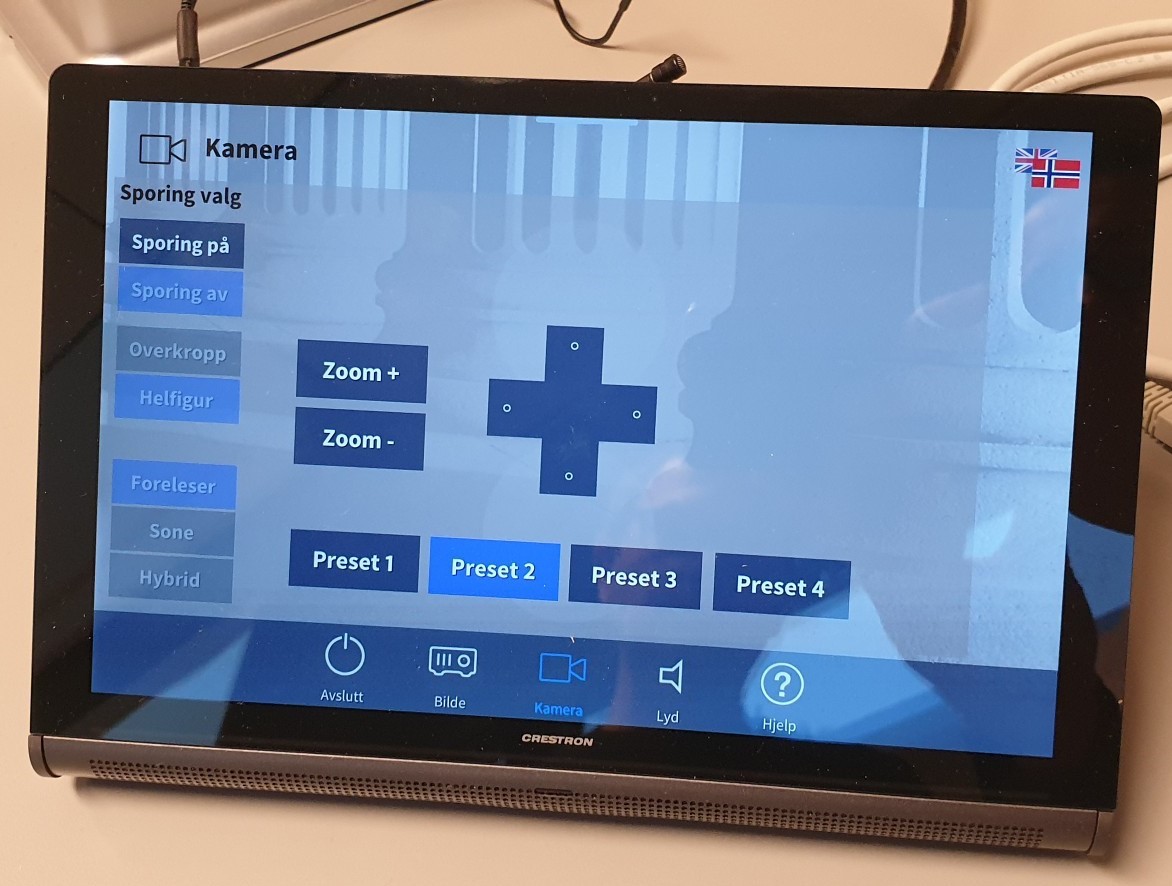
Under the Camera Menu, you can change the camera angle, zoom in/out, and activate the camera's tracking function (Sporing på). You can also activate Presets to use automatically programmed camera angles and positions for the room.
NOTE: The camera only functions when you use the Fast PC. The camera will not work with your laptop.
Speakers
Speakers are placed beside the projector screen.

Sound will only play through the speakers based on which screen is displayed on the Projector. If no sound is playing, ensure that you are projecting the screen that is playing sound to the Projector. You can change the Video/Image Source to the Projector from the Control Panel. Chose Fast PC-1, Fast PC-2, or Laptop to be displayed on the Projector.
Microphones
All seminar rooms are equipped with two different types of microphones. Wireless headsets are placed on the lectern and can be used by a single person. Wireless headsets are connected to the room's speakers and can automatically connect with Zoom or Teams and the room's Telelooper system.
There is also a microphone mounted to the ceiling. The ceiling microphone can be used to broadcast sound from the entire room. This microphone is useful when using Zoom or Teams, or a person needs to use the Telelooper system.
All microphone functions are controlled by the Control Panel.
Wireless headset microphones
Wireless headset microphones are found in their chargers on the lectern. When using the wireless headset, set the microphone harness over your ears and clip the transmitter to your pants, belt, or pocket. The wireless headset automatically connects to Zoom or teams and the room speakers.
Control the wireless microphone volume from the Lyd menu on the Control Panel. If you want Zoom/Teams participants to only hear the wireless microphone during seminars, mute the ceiling microphone from the Lyd menu on the Control Panel. You can also mute the wireless headset microphone from the Lyd menu on the Control Panel.
NOTE: When finished, please set the wireless headset back into the charging port so the device is ready for the next user.

Ceiling Microphone
The ceiling microphone will broadcast sound from the room and is automatically enabled and connected to Zoom, Teams, and the telelooper. You can chose to mute the ceiling microphone at any point from the Lyd menu on the Control Panel.
Telelooper
All seminar rooms have a telelooper device placed by the entrance/exit door. The telelooper can connect and transmit audio from the room's microphones and PC to hearing aids.

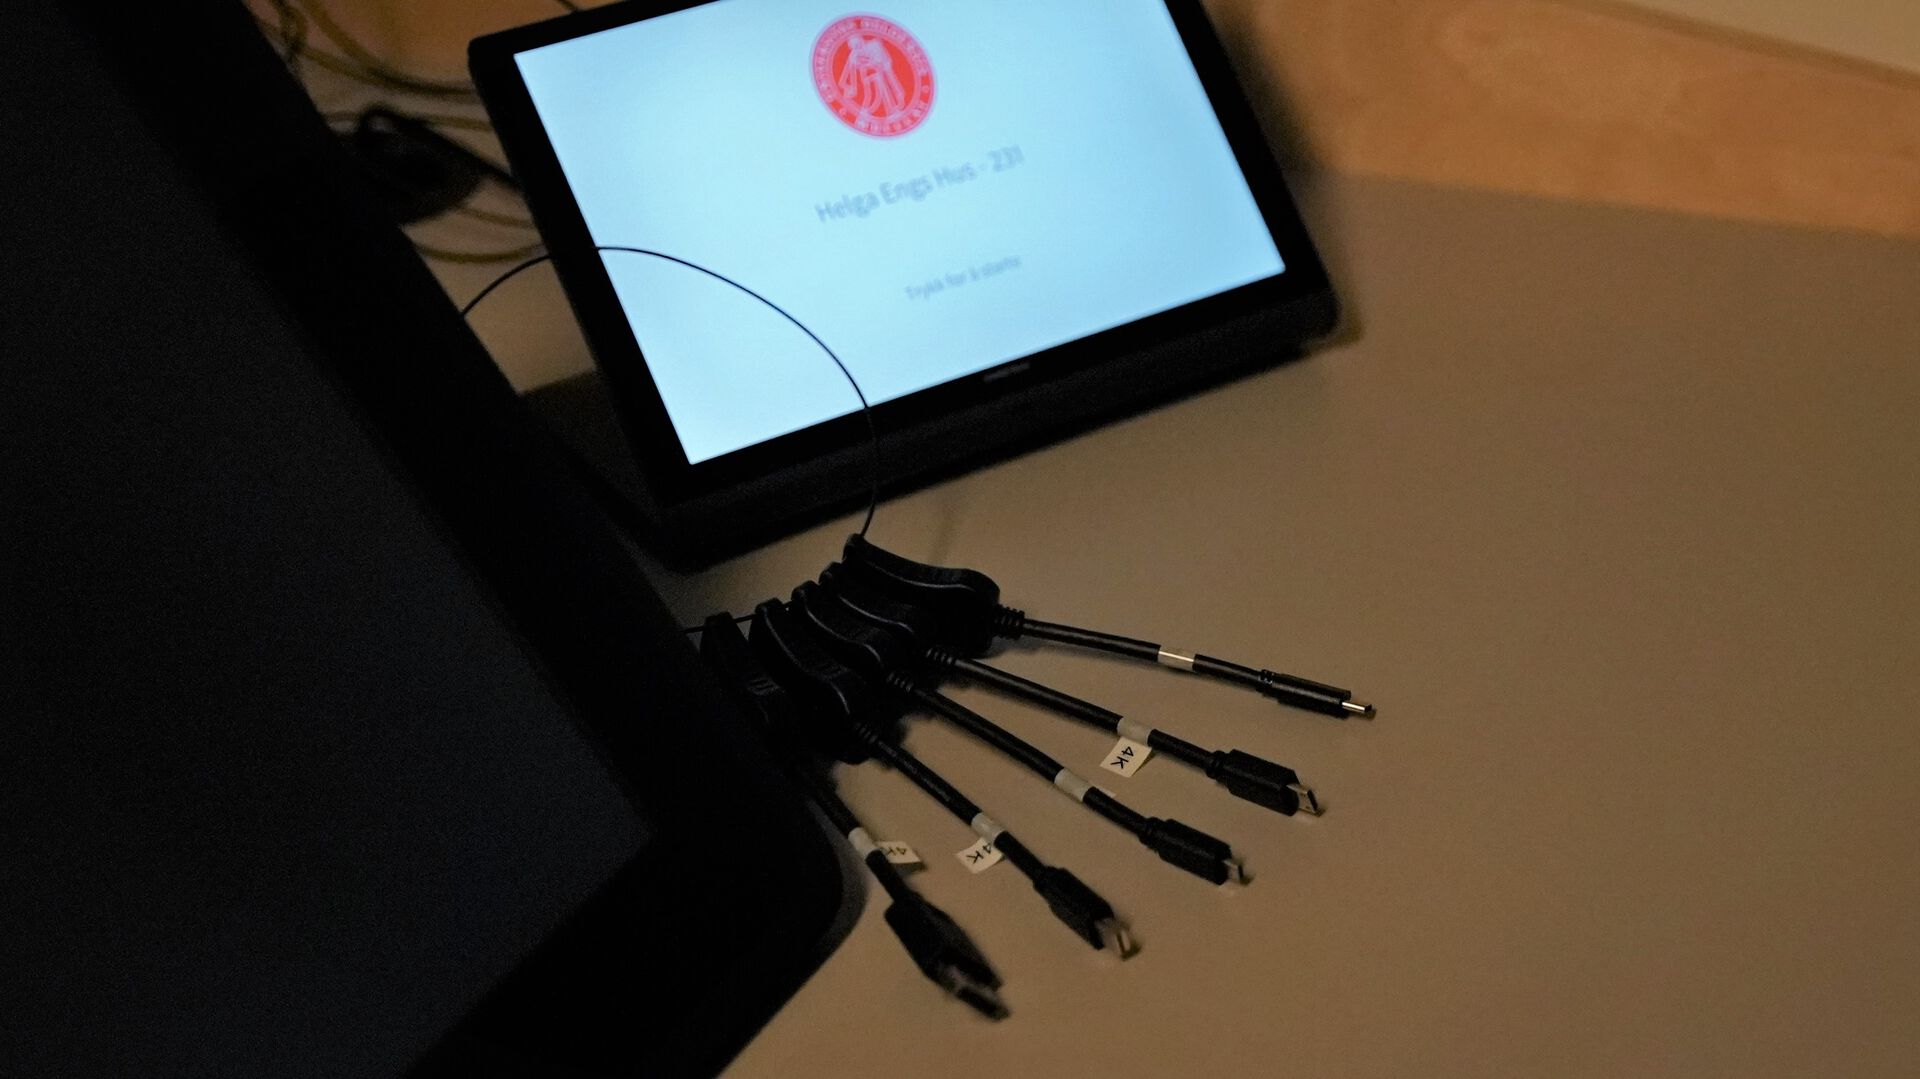
Connecting a laptop
Once the Control Panel and stationary PC has started up, you can connect a laptop. Various connection adapters are available on the lectern. Choose the appropriate adapter for your laptop, plug the adapter into the HDMI cable on the lectern, then plug the adapter into your laptop.
Use the Control Panel Bilde icon to open the Video/Image Source menu. You have the option to display your laptop to the Projector, Side Screens, and/or Back Wall Screen.